We already covered how many watts a router and modem actually draw and what that means for runtime. This is the follow-up: the actual steps to set it up correctly, including one detail most guides skip entirely — your router almost certainly runs on DC power already, which means there’s a more efficient way to connect it than the wall outlet most people default to.
Step 1: Check Your Router and Modem’s Actual Voltage.
Flip your router over and look at its power supply label, or check the wall-wart adapter itself. Most home routers run on 12V DC, though some smaller or compact routers use 9V. If you have a separate modem, check its label too — they don’t always match the router’s voltage. This matters because it determines exactly which cable you need in Step 3.
Step 2: Understand Why a Direct DC Connection Is More Efficient.
If you plug your router into your power station’s AC outlet using its stock wall-wart adapter, here’s what’s actually happening: the power station converts its stored DC battery power into AC, then your router’s own adapter immediately converts that AC back down to 12V DC. That’s double conversion, and — the same principle we covered in our CPAP power efficiency guide — it wastes real energy as heat in the process.
Most power stations have a 12V DC output port (often a car-style cigarette lighter socket). Connecting your router directly to that port, bypassing the AC inverter entirely, is measurably more efficient — and since router and modem loads are so low to begin with, this is one of the easier wins in this entire outage-prep series for stretching runtime.
Step 3: Get the Right Cable.
You’ll need a cable that matches both ends: your power station’s DC output (commonly a car-style 12V socket) and your router’s DC input jack (commonly a 5.5mm x 2.1mm barrel connector, though this varies). A basic 12V car-socket-to-barrel-jack cable, matched to your router’s specific voltage and jack size, is inexpensive and widely available — just confirm the polarity (center-positive is standard for most routers, but verify against your device’s label) before connecting.
If your router runs on 9V and your power station’s DC output is a fixed 12V, you’ll need a cable with a built-in voltage regulator, not a plain pass-through — connecting a 9V device directly to 12V without regulation can damage it.
Step 4: Test the Connection Before You Actually Need It.
Don’t wait for an outage to find out if your cable and voltage match are correct. Plug everything in during a normal day, unplug the power station from the wall, and confirm your router and modem both power up and connect to the internet normally.
This is a five-minute test that saves you from discovering a mismatched cable in the dark.
Step 5: Set Up Automatic Switchover, If Your Power Station Supports It.
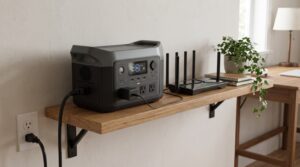
Some power stations — including the EcoFlow Delta 2 we’ve covered elsewhere in this series — include a UPS or pass-through mode: you leave the unit plugged into the wall continuously, with your router connected to the power station rather than directly to the outlet, and if the grid drops, the switchover happens automatically in milliseconds.
If your model supports this, it’s a genuine “set it up once and forget it” solution rather than something you scramble to connect during an actual outage.
Step 6: Don’t Forget the Modem.
If your router and modem are separate devices — common with cable internet — both need power for your connection to actually work, not just the router.
This is the single most common mistake in outage wifi setups: people power the router, get a solid wifi signal in their apartment, and still have no internet because the modem itself is dark.
Confirm both are connected to your power source, whether that’s two DC cables or one DC cable and one AC connection for whichever device doesn’t have an accessible DC option.
Step 7: Label Everything.
Once your setup works, label the cables and note the correct port on your power station with a piece of tape — during an actual outage, you want this to be a 30-second task in the dark, not a repeat of the troubleshooting you already did once in Step 4.
The Bottom Line.
The setup itself takes under fifteen minutes, and the DC-bypass step alone can meaningfully extend your runtime beyond what the AC-outlet approach gives you — worth doing even though it’s a bit more setup than just plugging in the stock cable.
Test it once on a normal day, and an outage becomes a non-event for your internet connection rather than a scramble.